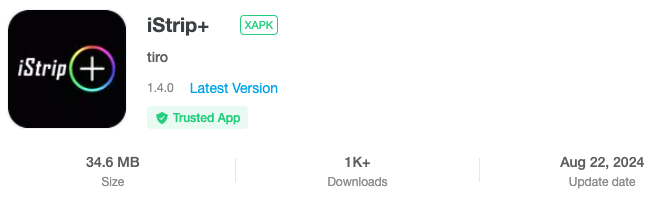
Reverse Engineering the iStrip+ App for Local Control – Part 1
To add some ambiance to my apartment at the end-of-year 2024, I bought several smart lights. Among them was a sunset lamp, controllable via Bluetooth. While the official app worked fine, no Home Assistant integration existed.
As I wanted local control, secure, fast, and fully integrated with Home Assistant. Armed with my iPhone, a Raspberry Pi 4, an ESP32, and a healthy dose of determination, I set out to reverse engineer the sunset lamp and build a Home Assistant integration from scratch.
Step 1: Discovering the app
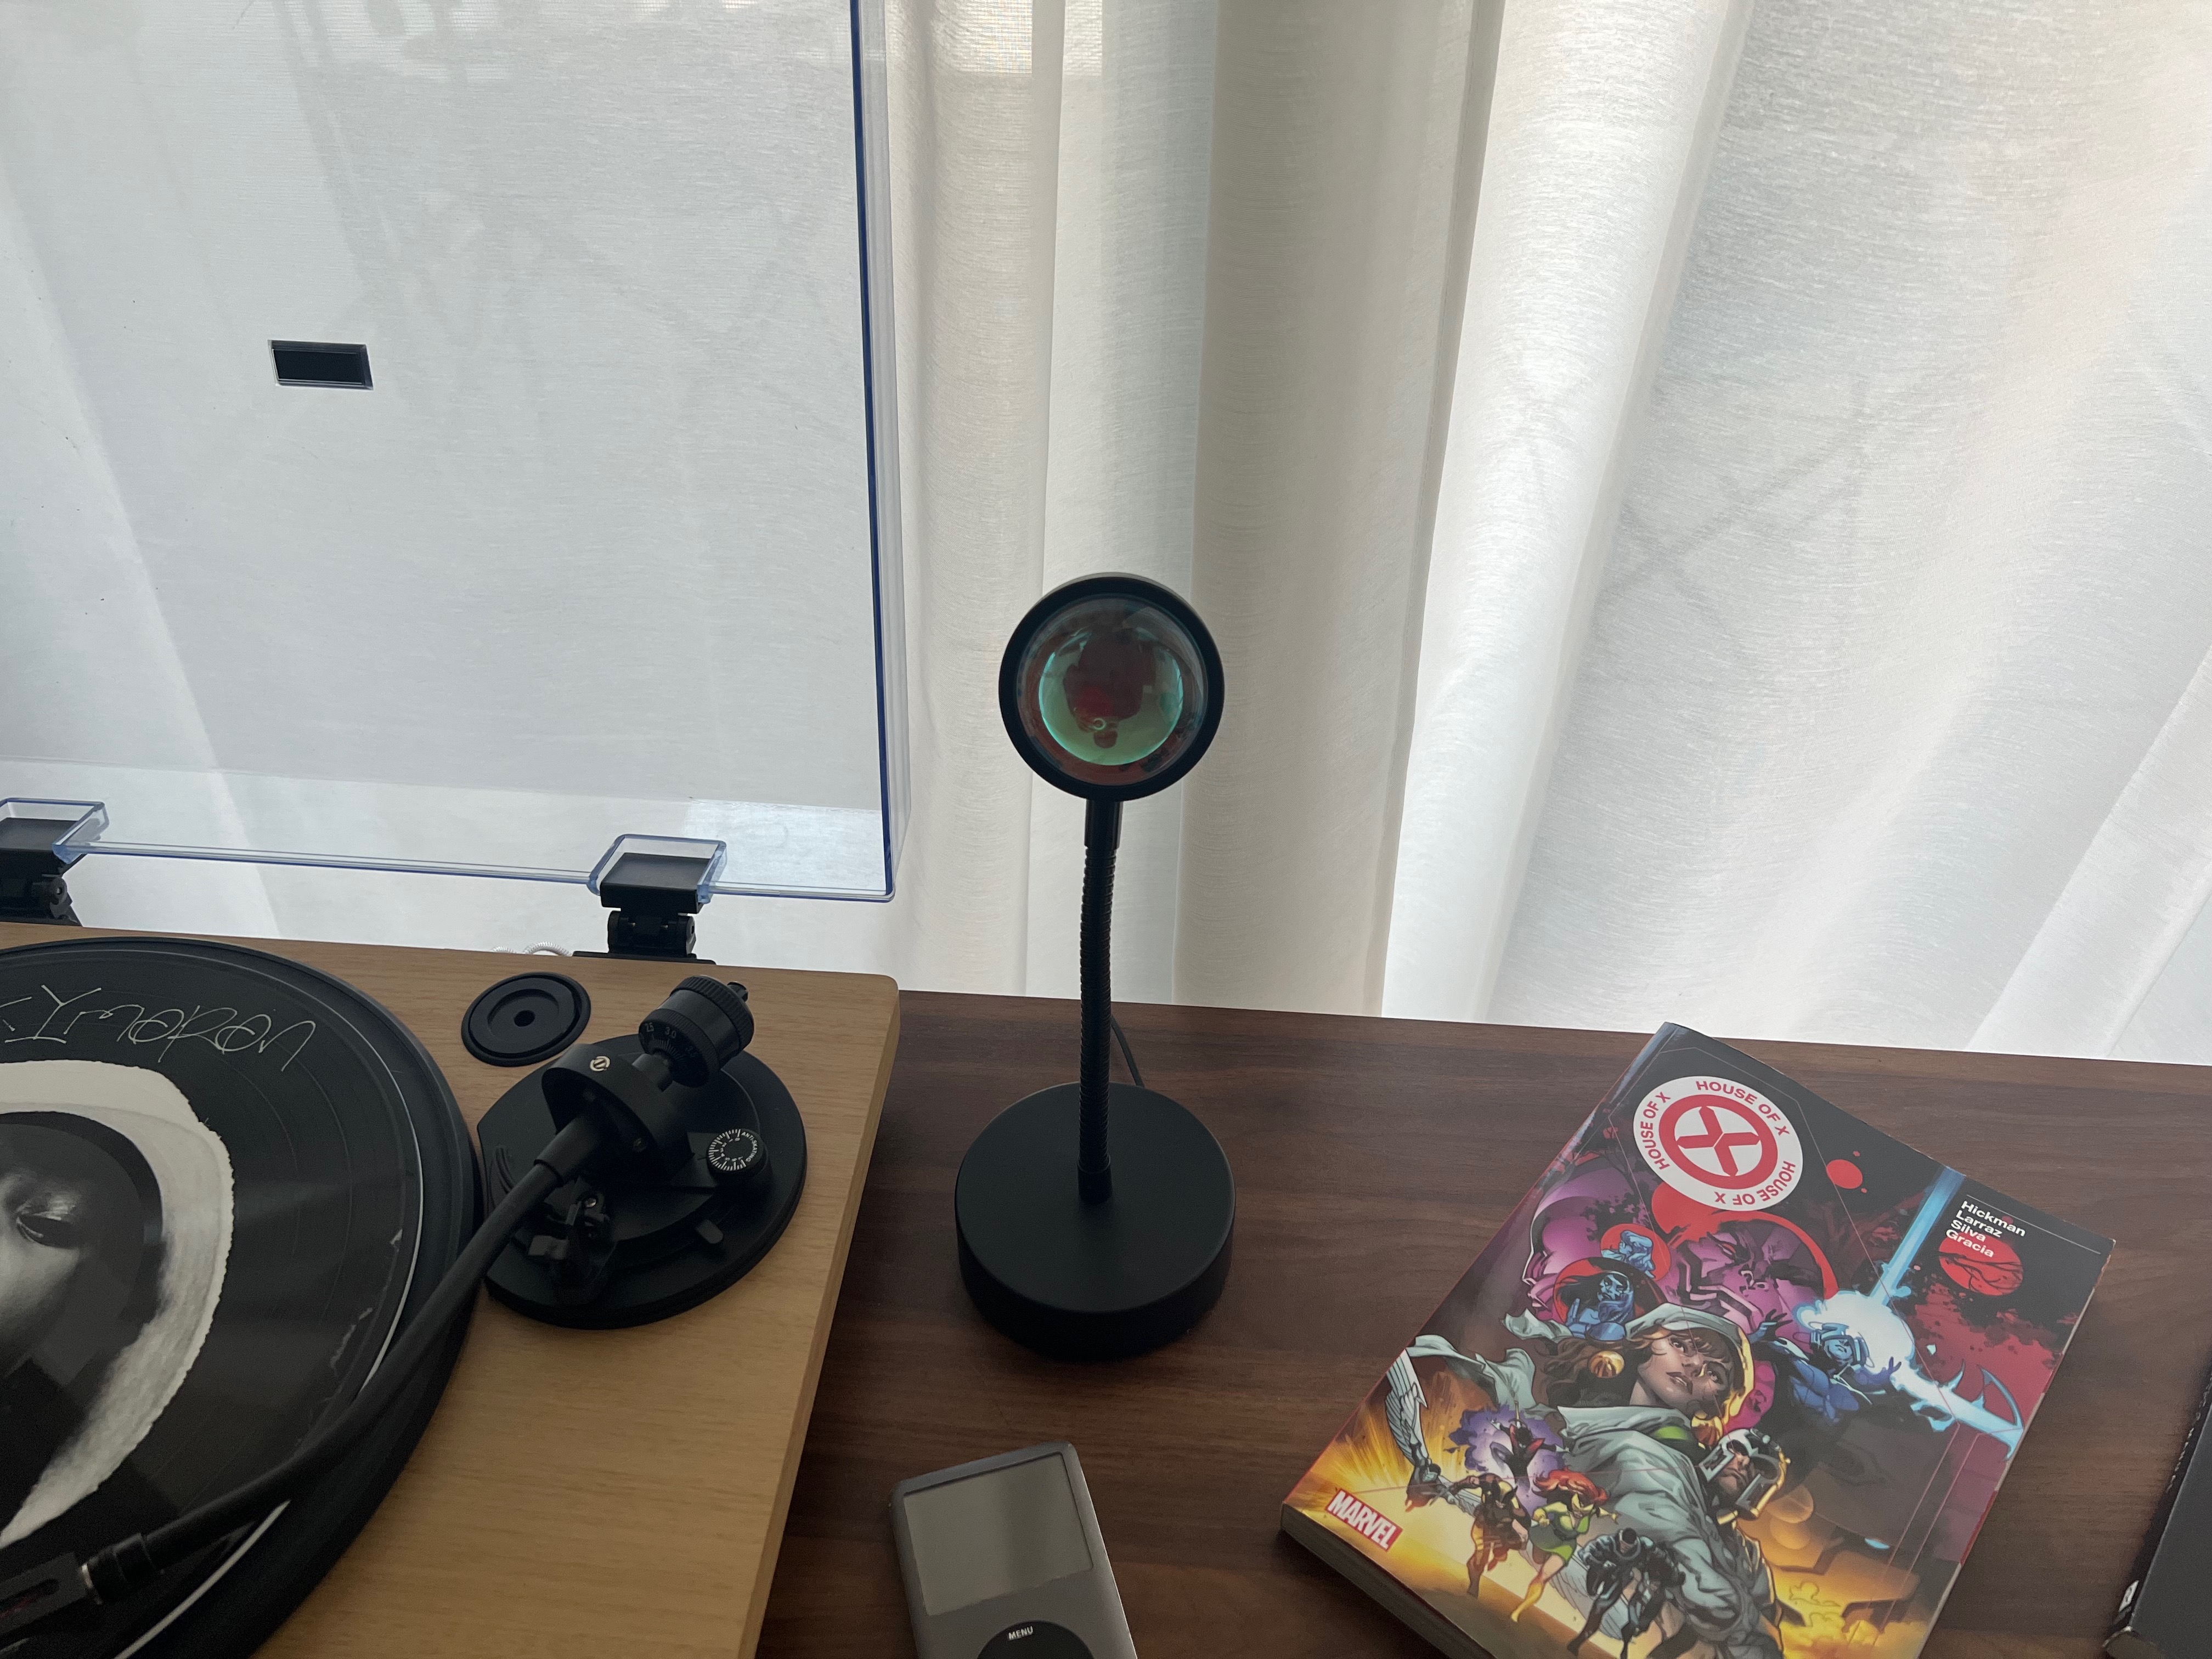
My first goal was to understand how the iStrip+ app communicates with the lamp. I decided to capture Bluetooth packets exchanged between the iPhone and the lamp. Using nRF Connect, I scanned for devices and connected to the lamp.
Once connected, I could see traffic and inspect the exposed services and characteristics available for reading and writing.
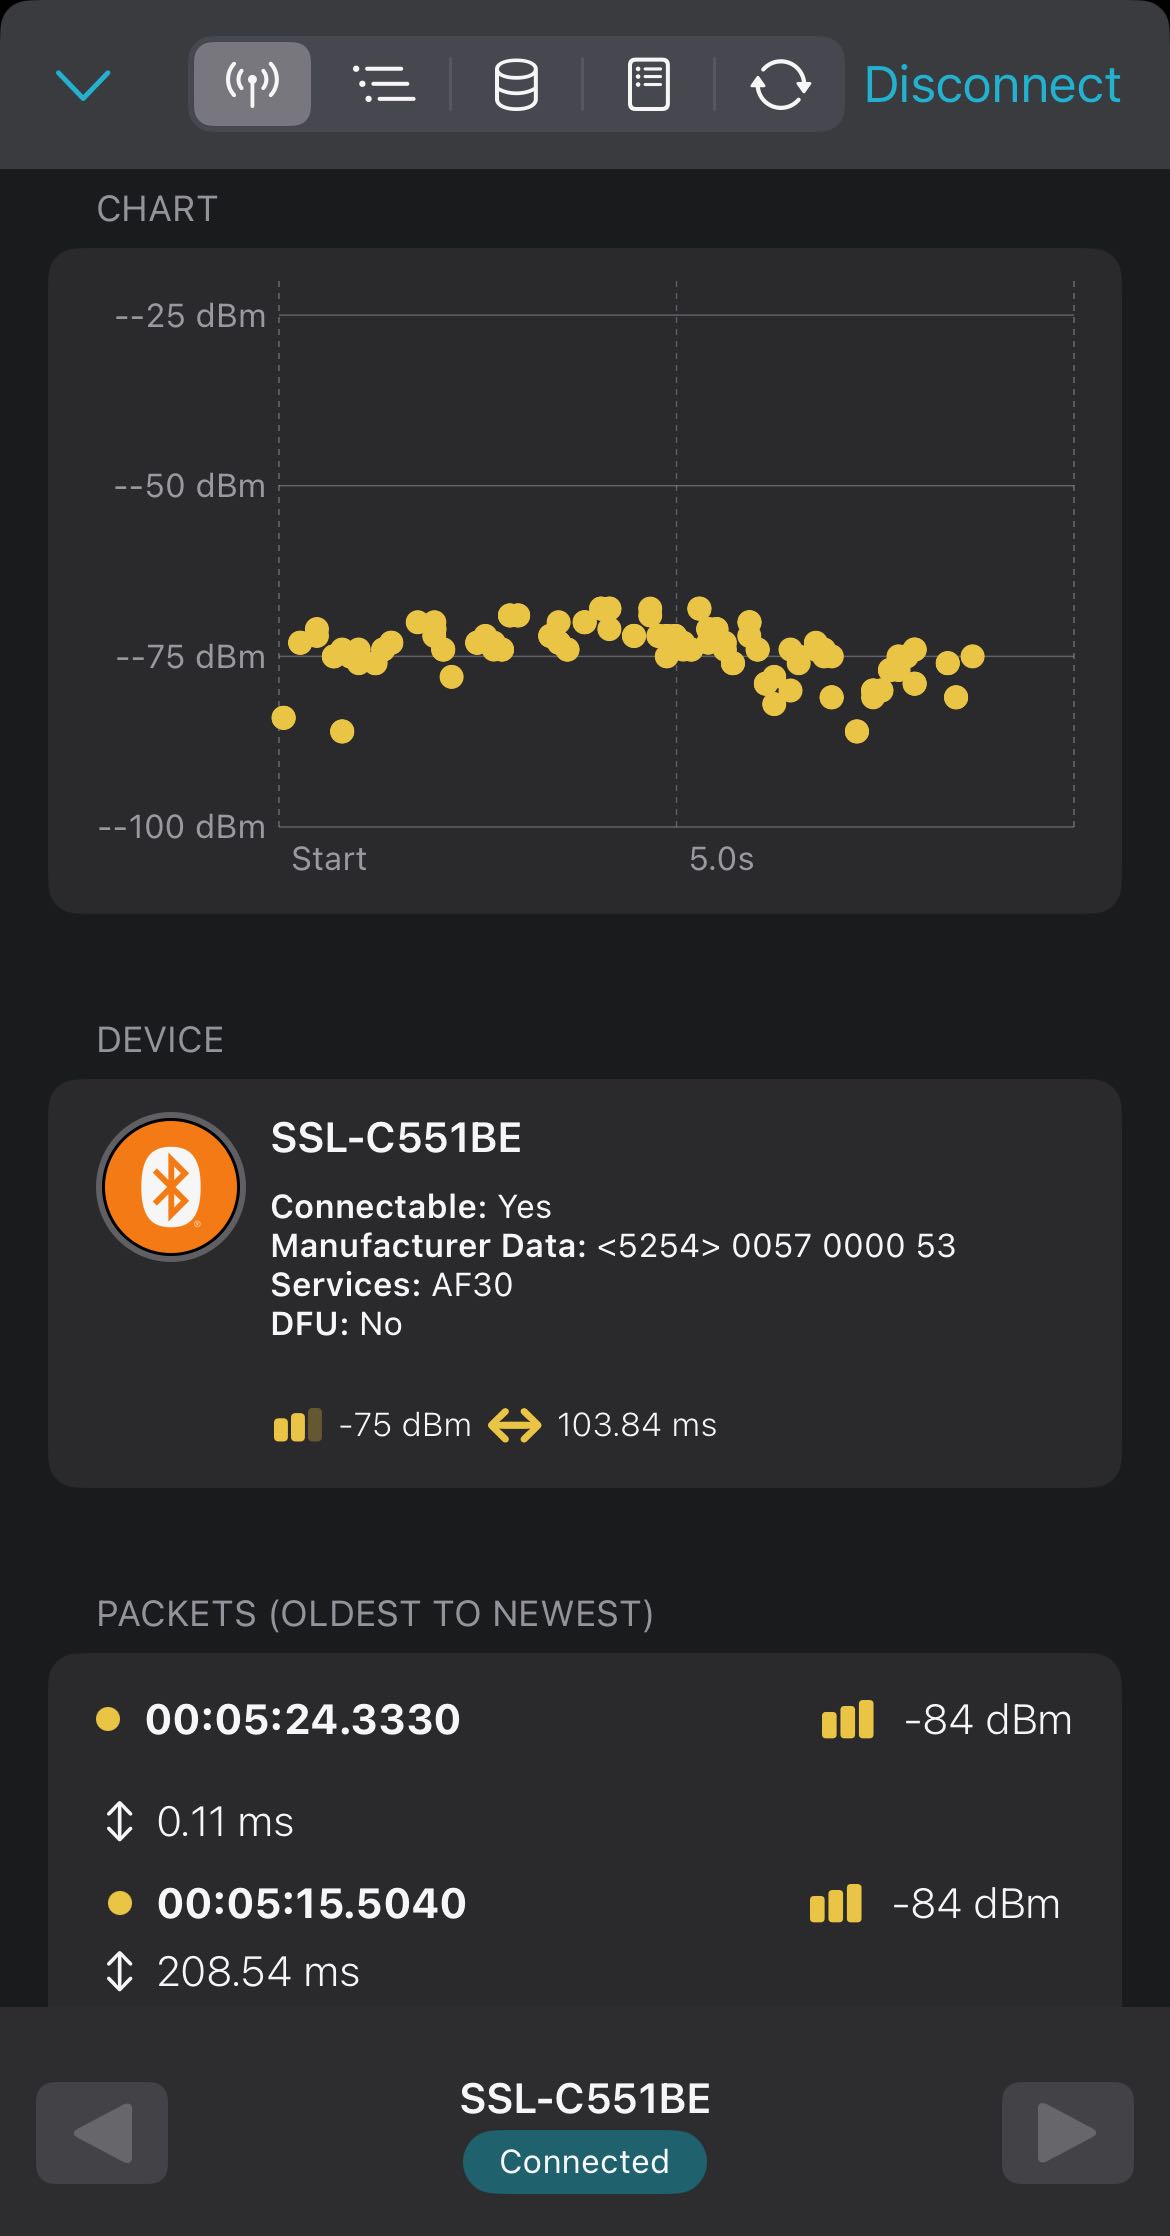
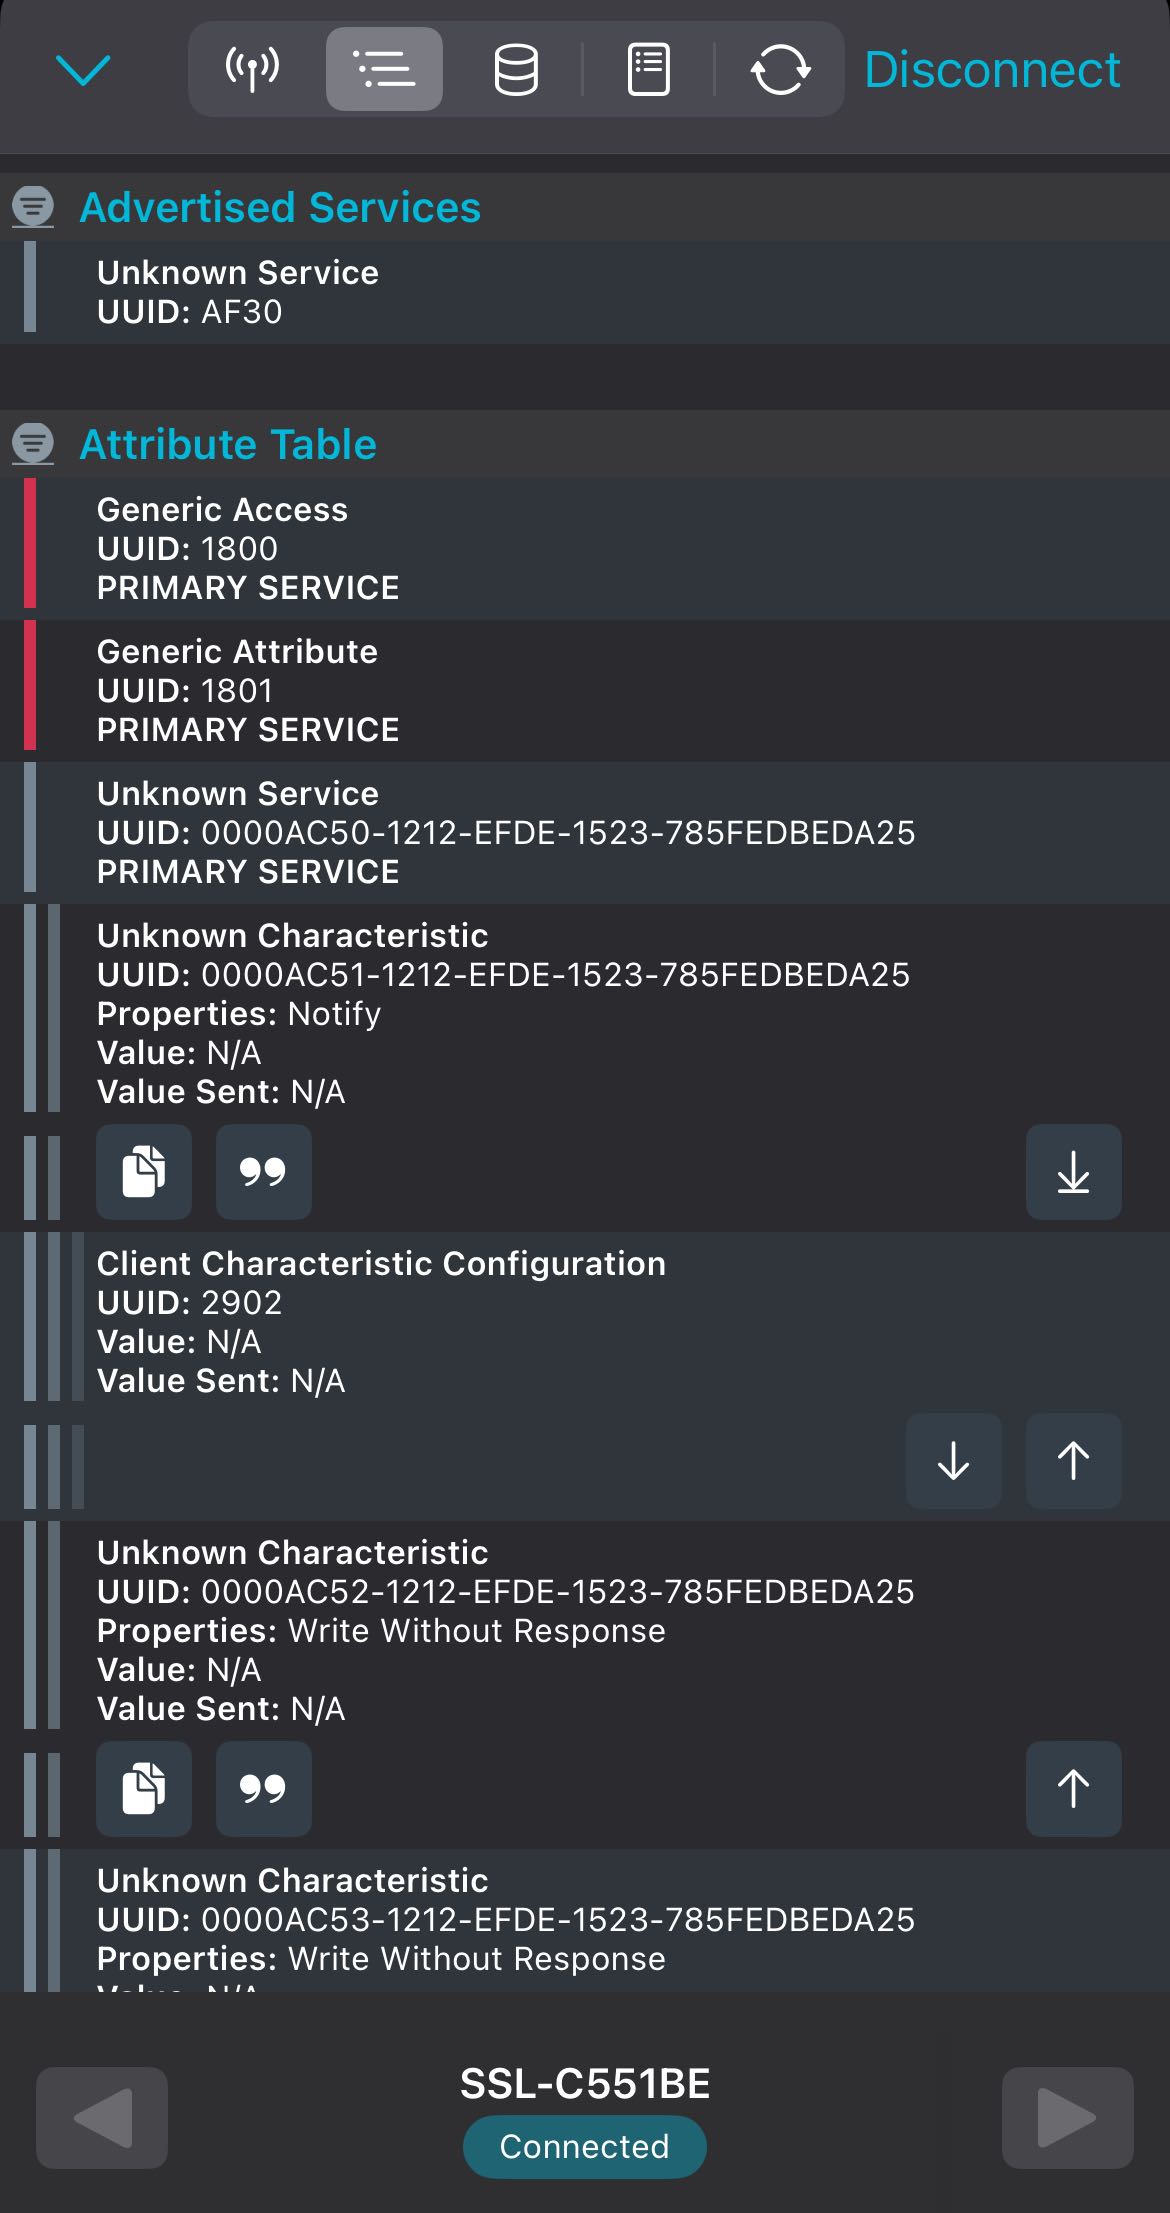
I tried controlling the lamp via the iStrip+ app while monitoring with nRF Connect, but the app couldn’t connect when nRF Connect was active. I then tried to write commands directly from nRF Connect, but the lamp didn’t respond.
After some research, I found a blog post “Reverse Engineering a Bluetooth Low Energy Light Bulb (Adafruit)” describing a similar reverse engineering process for a BLE light(??)…
I realized I needed a better understanding of Bluetooth Low Energy (BLE), so I went over this article BT/BLE: Main Difference.
TL;DR:

Bluetooth BR/EDR (Classic):

    - Supports all types of data, including audio/video streams → high throughput
    - Pairing required for secure connections
    - Can handle multiple simultaneous connections
Bluetooth Low Energy (BLE):

    - Asynchronous data exchanges → low throughput, no continuous streams
    - Pairing optional
    - Usually one device at a time, but multiple connections possible depending on hardware
This explained why my lamp likely allowed only one active connection at a time.
Realizing BLE’s single-connection behavior limited my approach, I switched to analyzing the official APK to inspect the app’s internal communication with the lamp.
Step 2: Analyzing the APK
Using jadx-gui to decompile the APK , I searched the source code for anything that could be relevant to controlling the lamp.
After some digging, I finally discovered a file named BleProtocol containing BleProtocol class responsible for controlling the lamp.
For example, the sendColor method constructs a byte array containing color and control information, then encrypts and sends it via BLE.
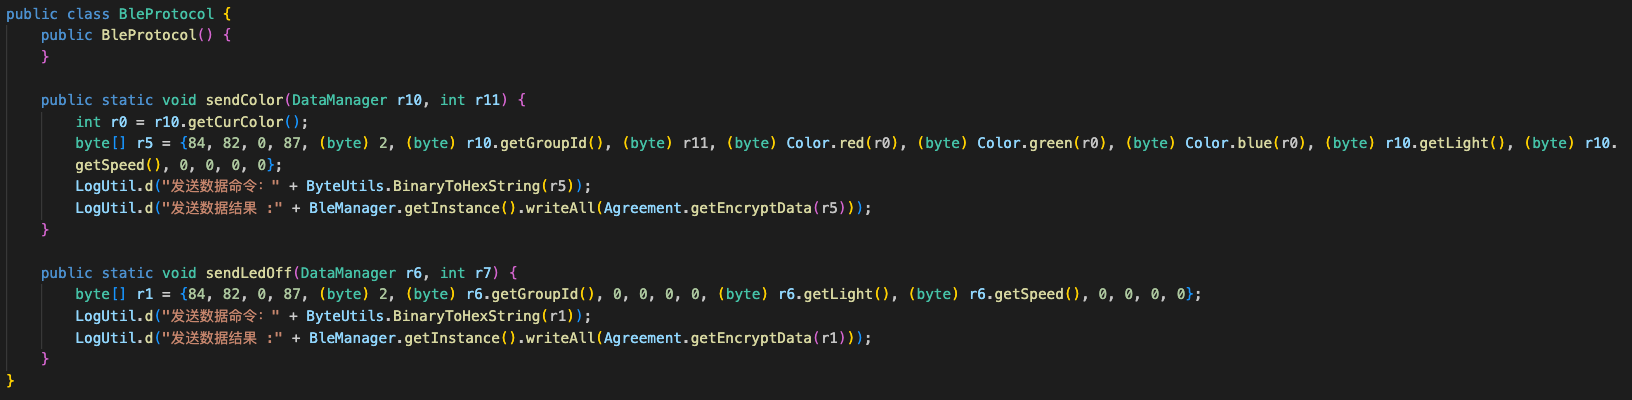
That’s when things got more interesting. The app uses encryption to secure communication with the lamp. The getEncryptData method applies AES encryption to outgoing data before sending it to the lamp within an Agreement class, that provides methods for constructing commands and handling encryption.

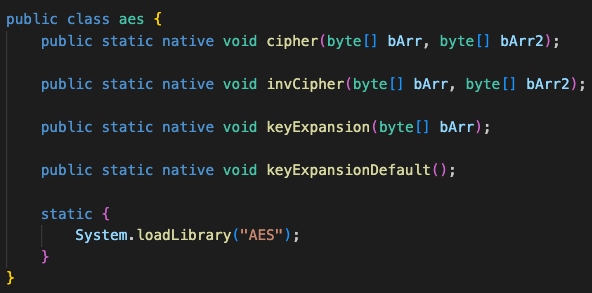
Digging deeper, I found that the AES logic is implemented in a native library (libAES.so). The Java AES class exposes methods such as cipher, invCipher, and keyExpansion, but these are just wrappers around native code…
This means the actual encryption key and logic are hidden in the native binary, so fully replicating the communication protocol requires analyzing this native library.
Step 3: Reverse Engineering the Native Library
As we dive deeper into this reverse engineering journey, I needed an anchor (like in the movie Inception) to keep me grounded: if my cup of coffee is full, it means I still have a long way to go.
I spent a few hours trying to find a tool that could analyze the native library, but most struggled with the ARM architecture used in the lamp’s firmware.
Finally, I found Ghidra, a powerful open-source reverse engineering tool developed by the NSA that supports ARM binaries.
I loaded the libAES.so library and used its decompiler to convert assembly into a more readable, C-like format.
Searching for the keyword AES, I quickly located four core functions implementing the AES logic:
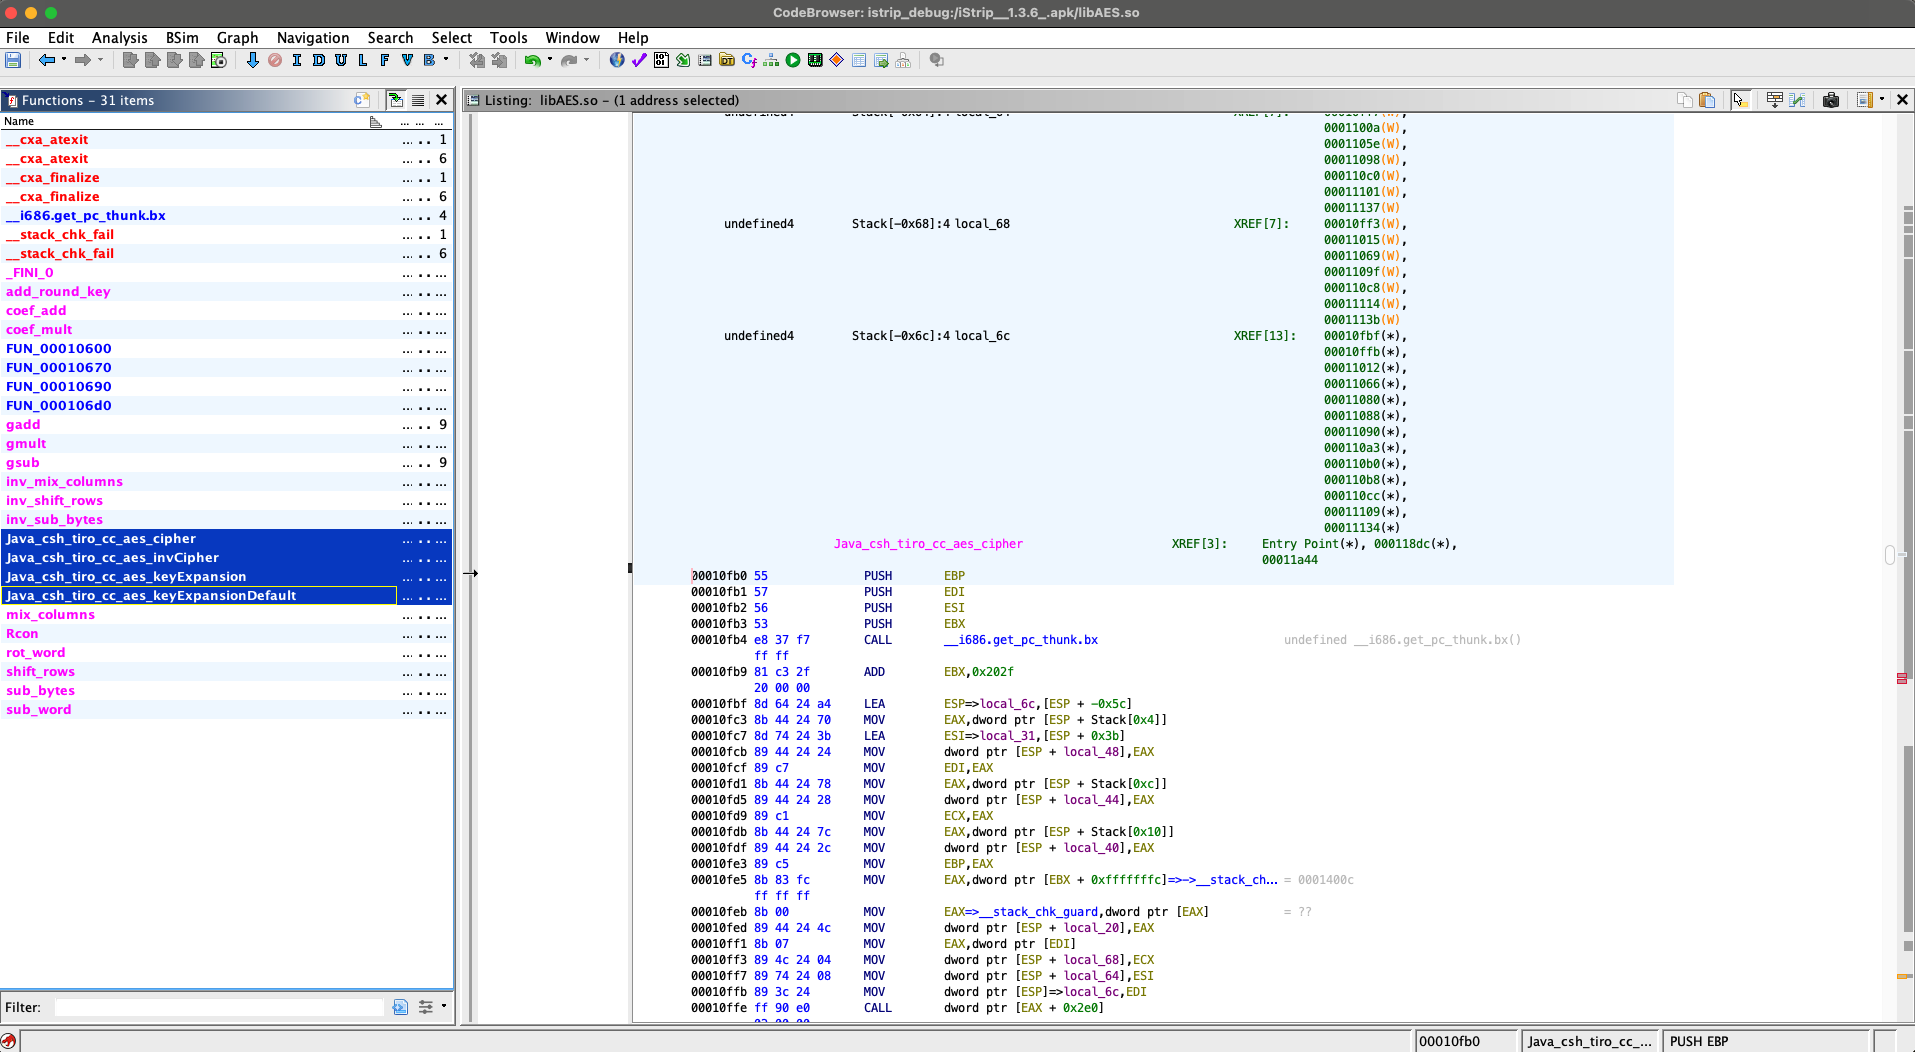
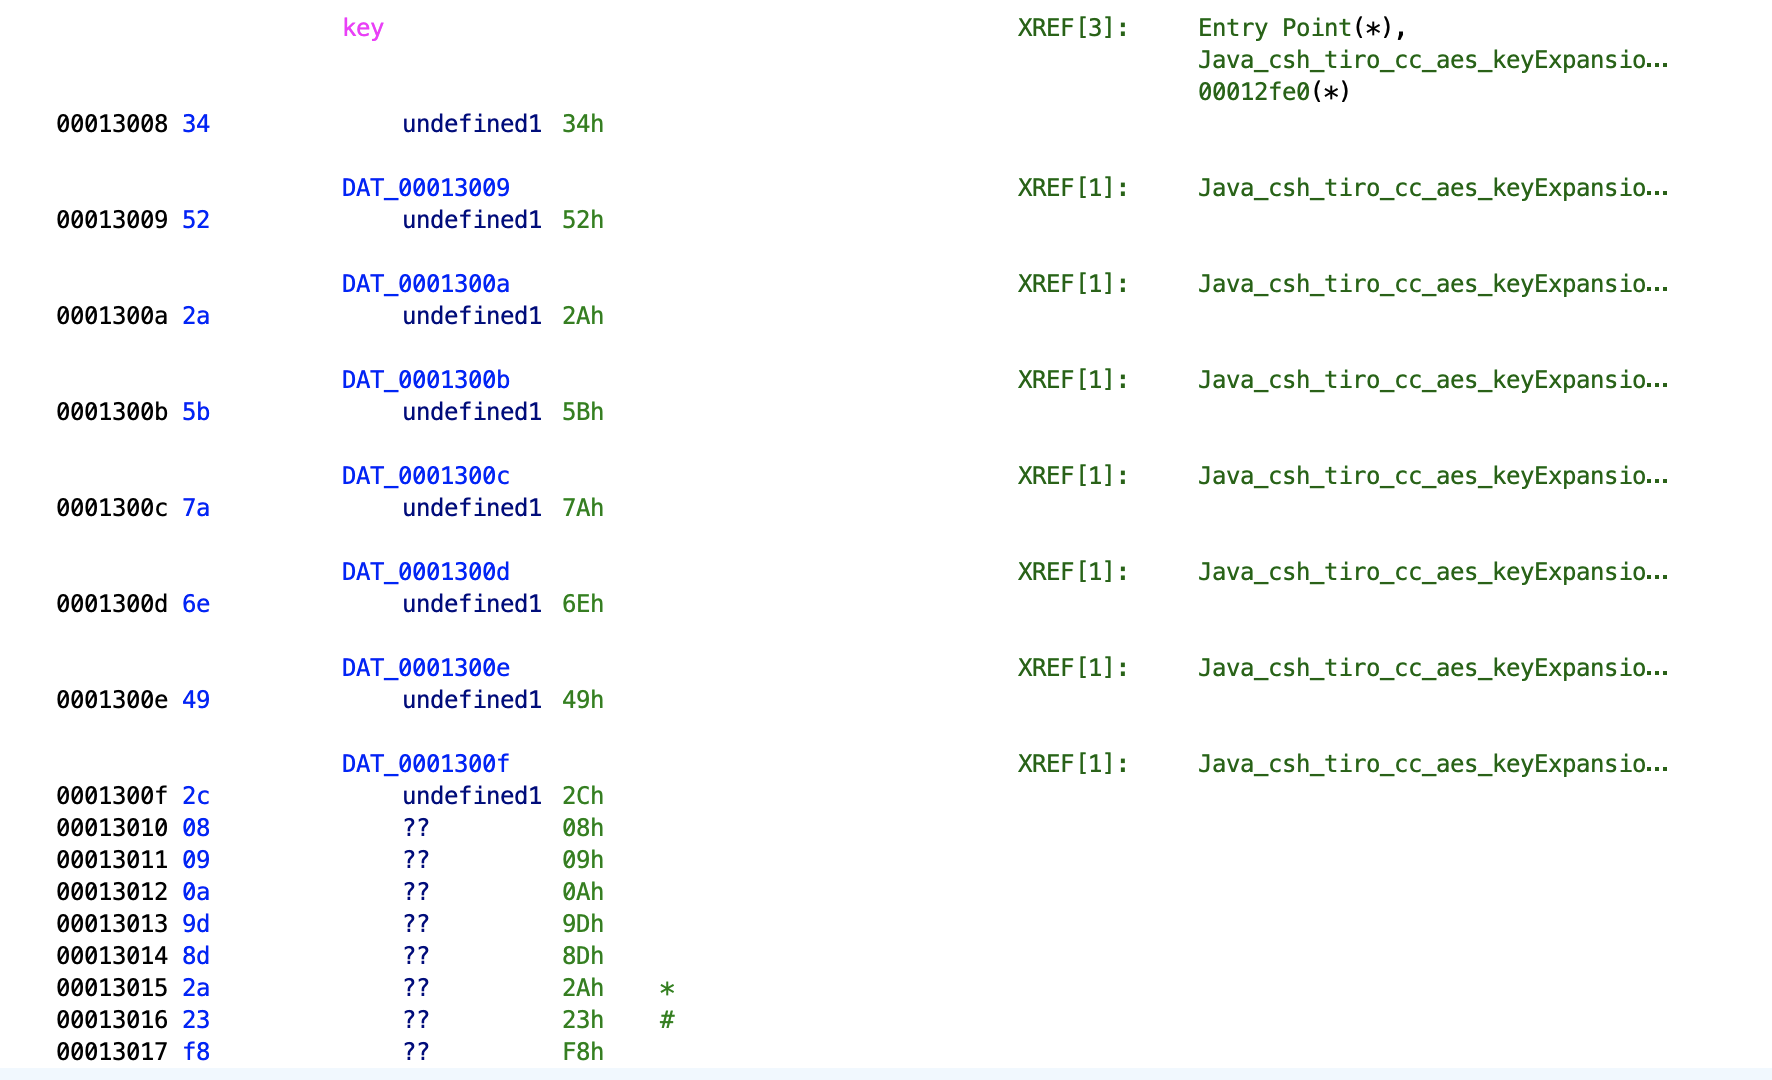
Among them, one stood out: Java_csh_tiro_cc_aes_keyExpansionDefault. This function generates the AES round keys. Looking at the disassembly, it loads a pointer/array at virtual address 0x00013008.
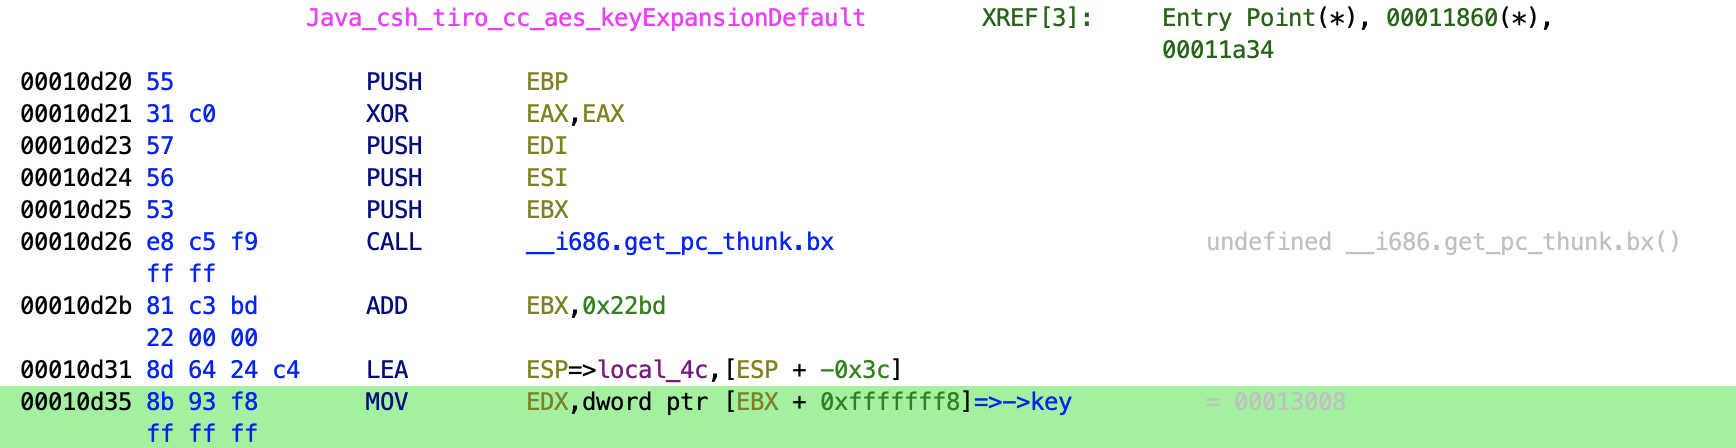
Searching this address in Ghidra revealed a contiguous array of bytes representing the AES key material used by the keyExpansion function (34 52 2A 5B 7A 6E 49 2C 08 09 0A 9D 8D 2A 23 F8). While this isn’t the fully expanded AES key schedule, it serves as the starting point for generating the round keys, giving me everything needed to replicate the encryption logic.
This confirmed that the app shipped its own AES implementation, hiding the actual encryption logic inside the native library. With the key material uncovered, the core AES functions mapped out and my cup of coffee empty, I now had everything needed to replicate the encryption.
The next step would be to implement the same logic in Python, generate valid payloads for the lamp, and ultimately create a Home Assistant integration. But that story begins in Part 2.